How to trigger Netlify build Using Google Scheduler
netlify
hugo
Google Cloud
cloud
Follow @akhromieievWell, I decided to migrate from Firebase Cloud Functions to Google Scheduler, because it’s much simpler if you want to send only POST-request. It has already an existing UI for setting the Webhook URL.
Prerequisites
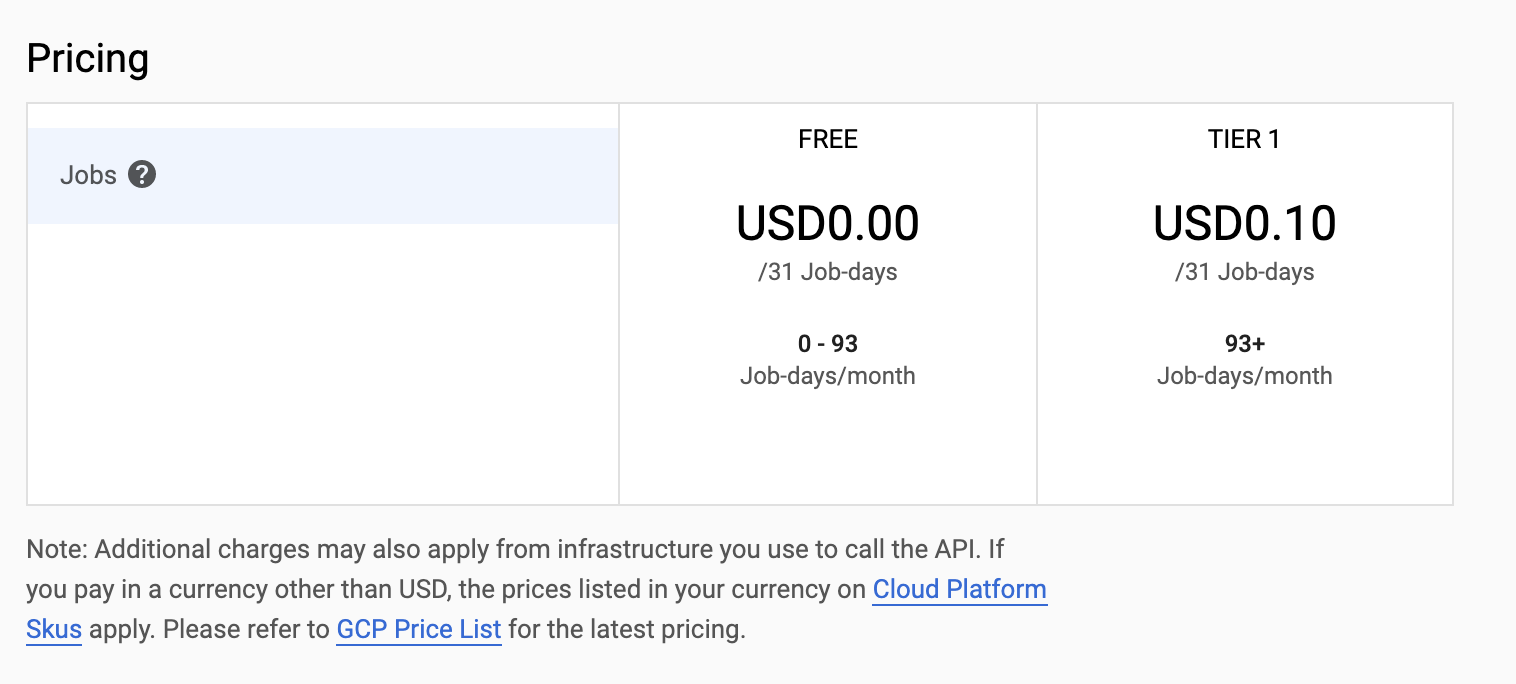
To follow this guide you need to have or create a project in the Google Cloud. If you never logged in, you can try free trial. But, as I understood the 3 cron jobs per month are free and all others - 0.10$ by each job.
Create a job
Go to your Google Cloud project and search for Cloud Scheduler API. Enable it for your project.
There a lot of ways to enable Scheduler API. The way above is one example.
Then go to Products > Cloud Scheduler
You got to the page with all jobs:

Press Create job button.
Add the name, frequency (uses cron syntax), timezone. Select HTTP as Target, fill the URL and set the HTTP method. In my case, I have added a Webhook URL from Netlify. The POST request to this URL will trigger a blog build. I already described this in my post.
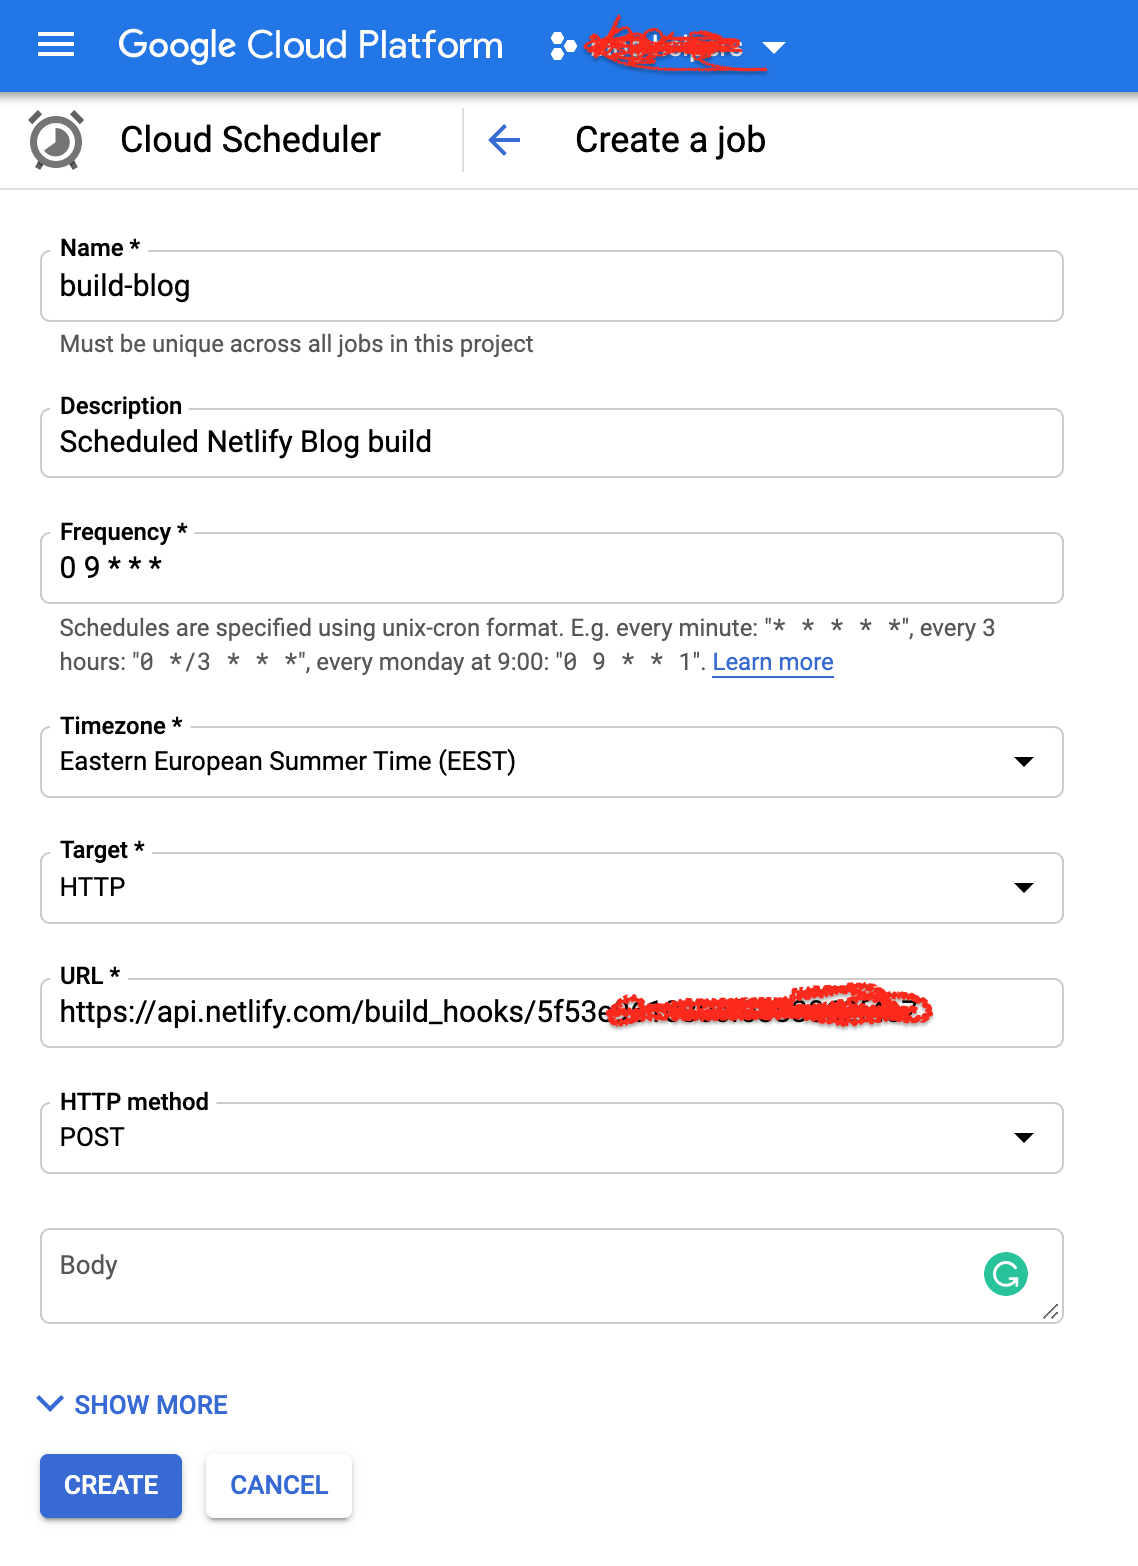
Press Create as the last step.
If CRON is new for you, I recommend to visit the crontab guru
You will see your created job in the list:

In my case, it will run every day at 9 am (Ukraine timezone)
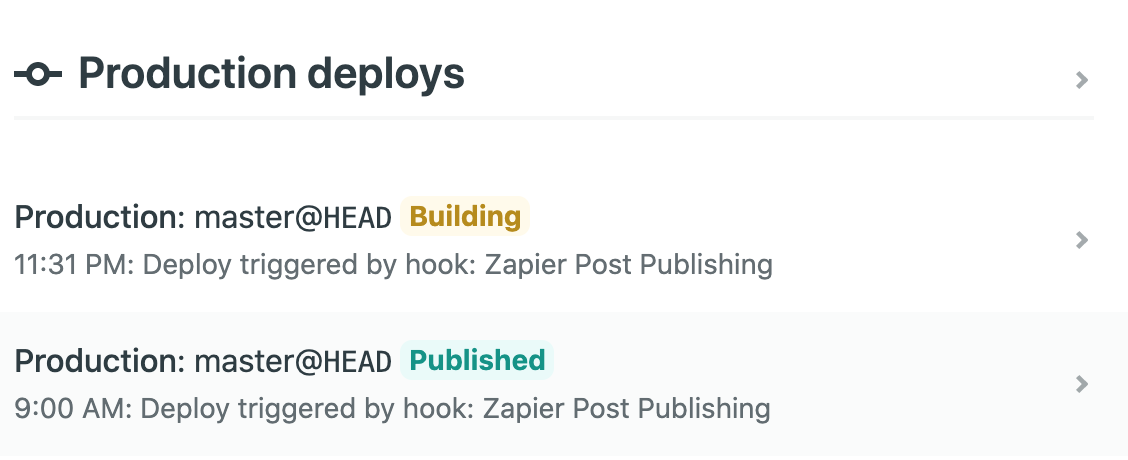
Netlify deploys will look like this:
Logs
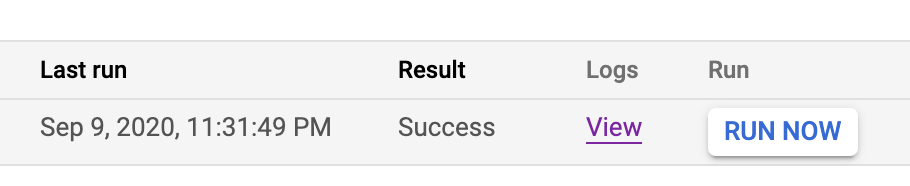
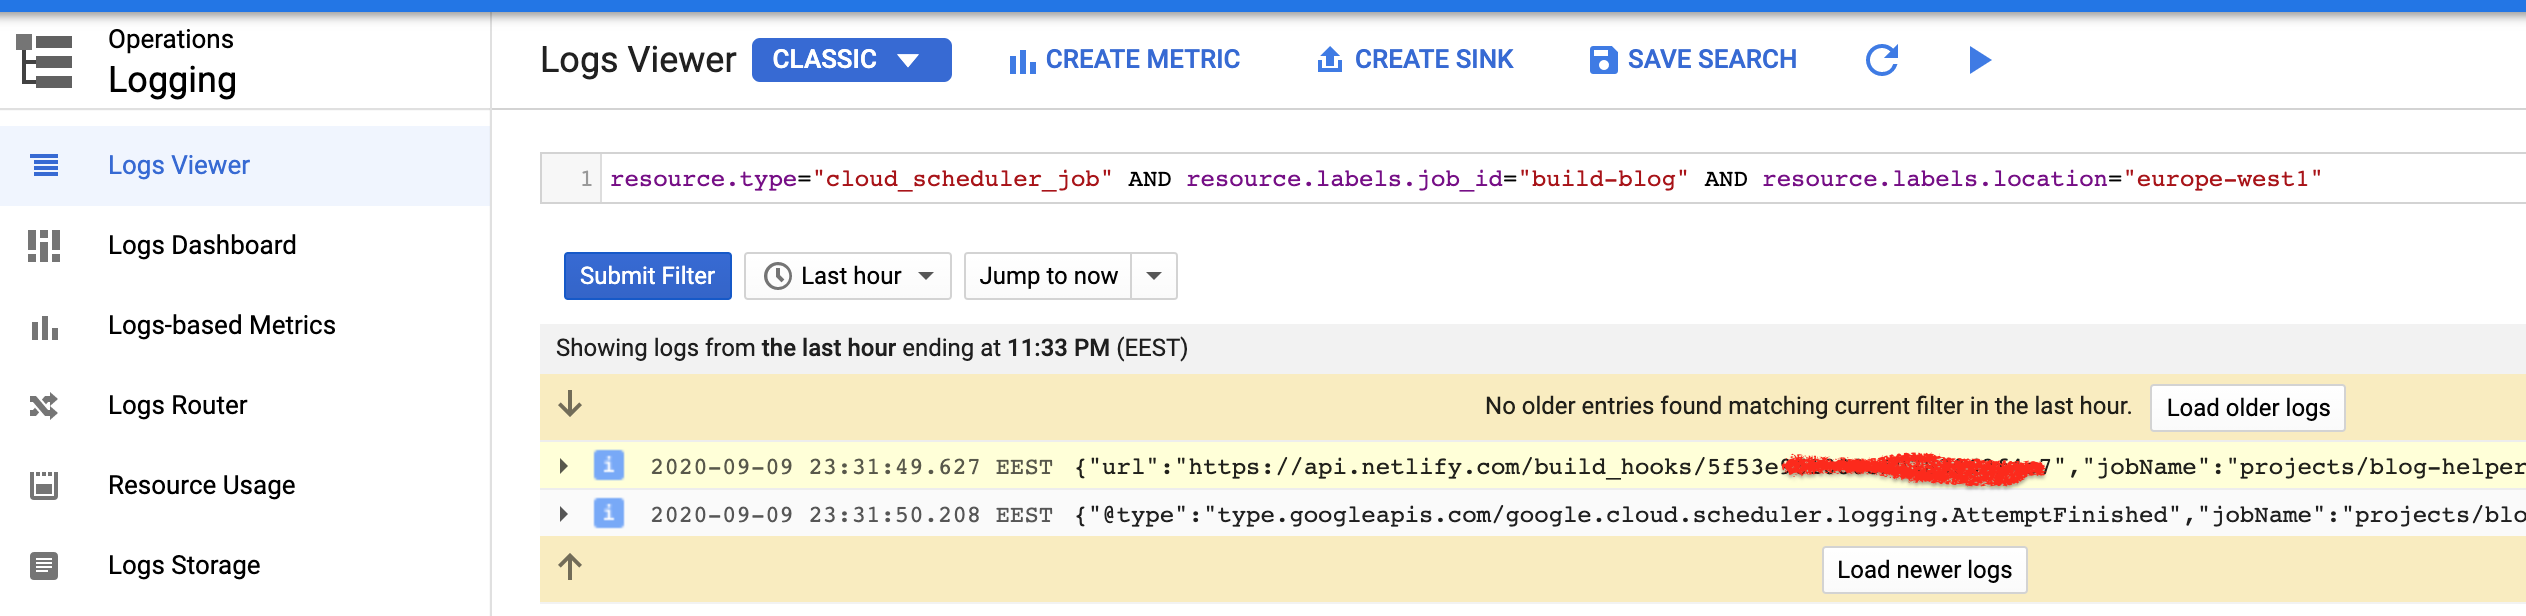
You can press **View” on your job and check the detailed log page for your cloud scheduler:
Logs Viewer page looks like the screenshot:
Conclusion
You can trigger any URL with Google Cloud Scheduler or do some action. It supports all types of HTTP methods.
comments powered by Disqus